GoogleAnalyticsを設定する方法
Google Analyticsは、Webトラフィックを表示および理解するために使用されます。
無料で使いやすいです。
多くのユースケースに合わせてカスタマイズできます。
それは箱から出して動作します。
セットアップは高速です。今日あなたの洞察を得てください!
私の無料のウェブサイトを作成する❯GoogleAnalyticsについて読むのをスキップします。私を直接最初のステップに連れて行ってください。最初のステップに進みます
GoogleAnalyticsとは
GoogleAnalyticsはWeb分析ソリューションです。
これは、Googleによって開発およびサポートされています。
最新バージョンはGoogleAnalytics4と呼ばれます。
オーディエンス、ページビュー、セッション、人口統計、イベントなどのデータを表示するために使用できます。
GoogleAnalyticsを有効にする理由
より良い決定をするためにあなたのウェブトラフィックを理解してください。
セールスファネルを理解して改善します。
実験から学ぶ(たとえば、a / bテスト)。
Googleには、GoogleOptimizeと呼ばれる別のソリューションがあります。このソリューションはテスト用に作成されています。
GoogleAnalyticsは誰ですか
Google Analyticsは、Webサイトを持っている人なら誰でも便利です。
それはあなたのサイトを誰が使用し、彼らがどのようにそれと相互作用するかについての情報をあなたに与えます。
また、インターフェースもわかりやすいです。
サービスを使用およびナビゲートするために分析のバックグラウンドは必要ありません。
GoogleAnalyticsを段階的に設定する方法
Google Analyticsは、グローバルWebサイトタグ(gtag.js)またはGoogleタグマネージャーの2つの方法で設定できます。
最も簡単な方法は、グローバルWebサイトタグを使用することです。
このチュートリアルでは、グローバルWebサイトタグアプローチを使用します。
準備
使用するコードエディタを決定し、環境を設定します。
W3Schoolsは、 W3SchoolsSpacesと呼ばれる使いやすいコードエディタを作成しました。サインアップして、数回クリックするだけで開始できます。
無料で始める❯コードを入力する準備ができるように、 index.htmlファイルを作成します。
すべてのセットアップ。さあ行こう!
Google Analyticsの設定:グローバルウェブサイトタグ
ステップ1:GoogleAnalyticsアカウントを作成する
Analyticsに移動:アカウントを作成するか、Analyticsにサインインします
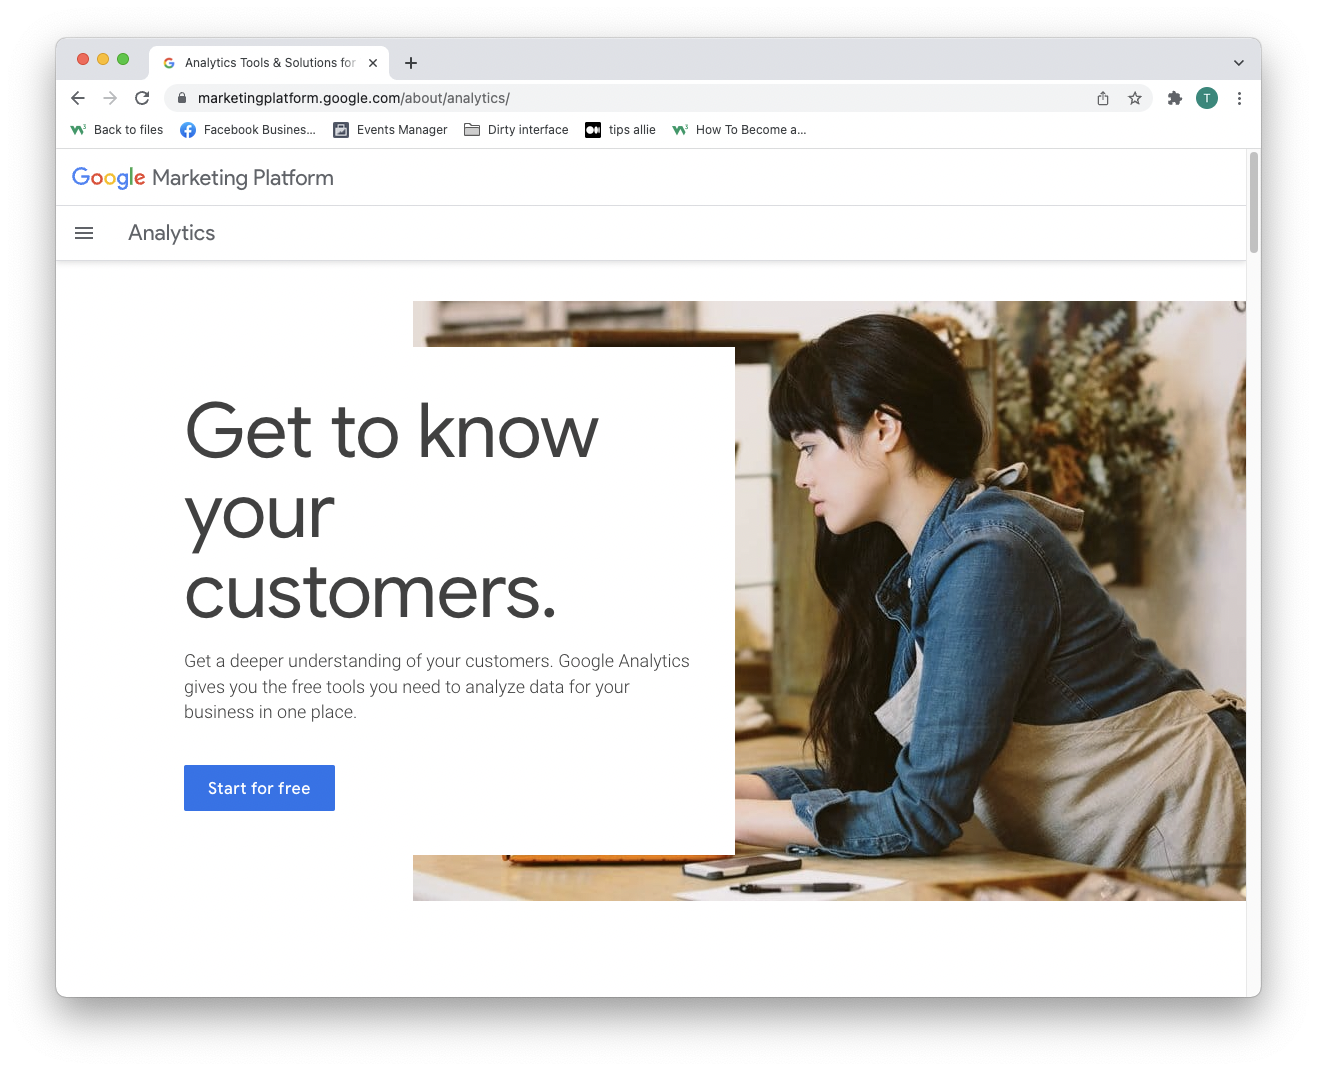
上記の段落のリンクをクリックすると、GoogleAnalyticsのランディングページに移動します。
「無料で開始」ボタンをクリックします。
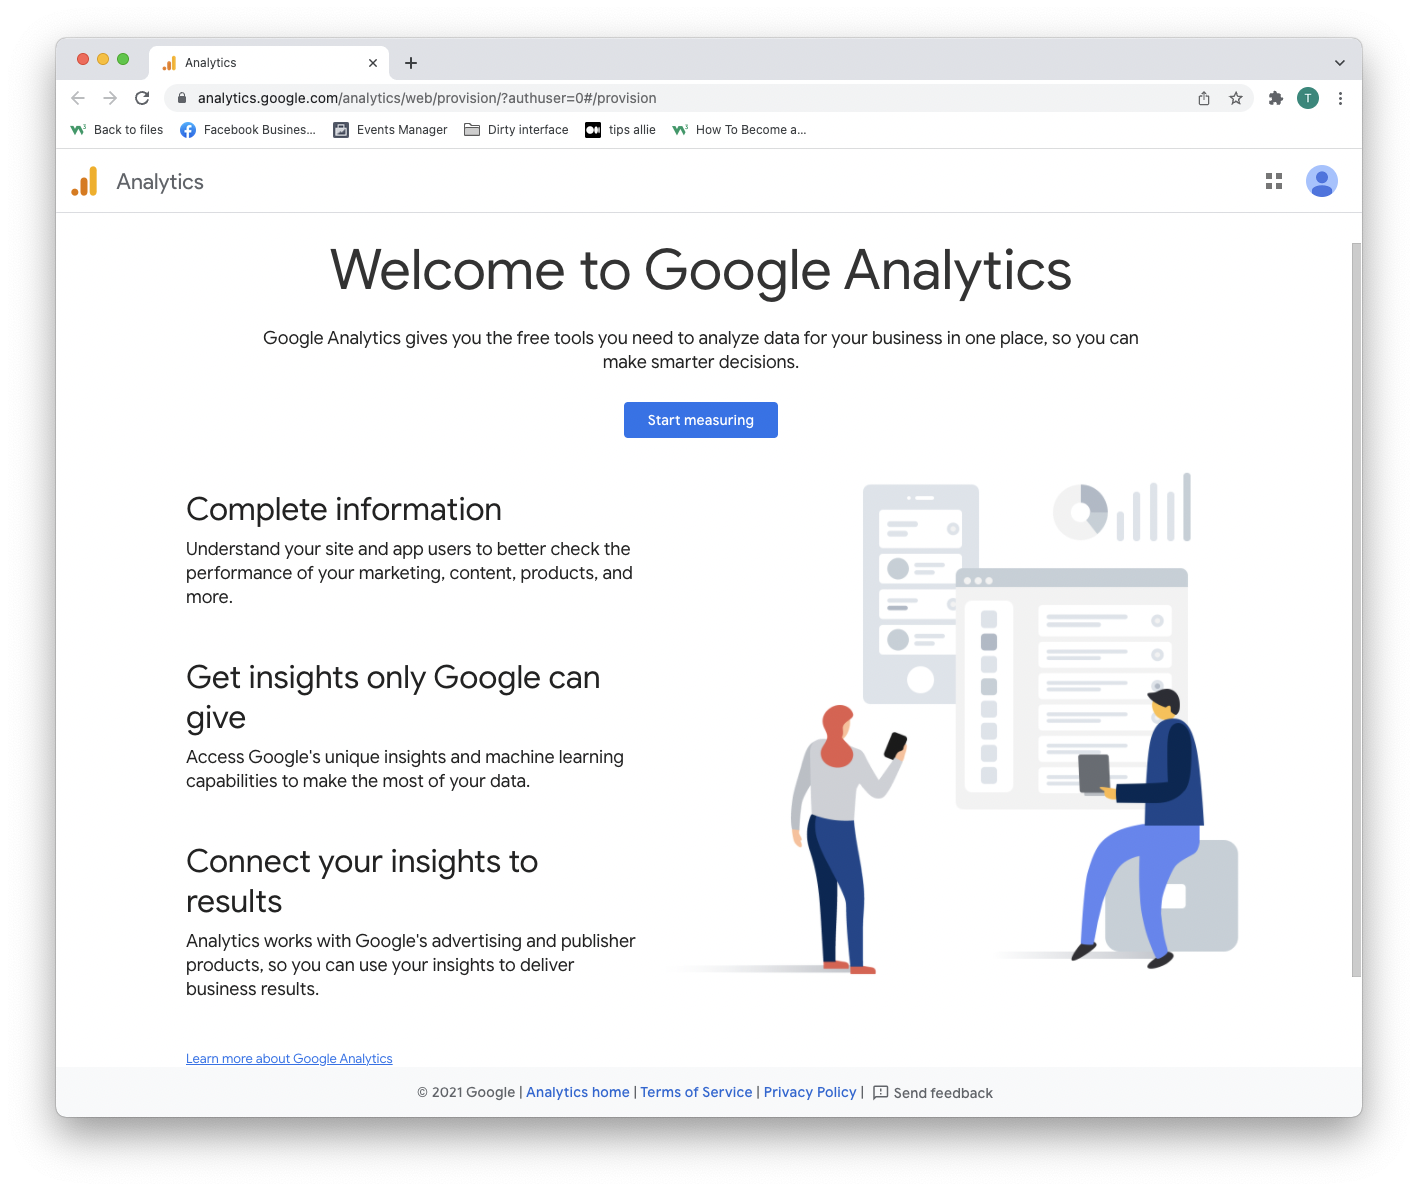
ステップ2:ウェルカムページに入る
アカウントを作成するかサインインした後、あなたは解決策に歓迎されます。
「測定開始」ボタンを押して続行します。
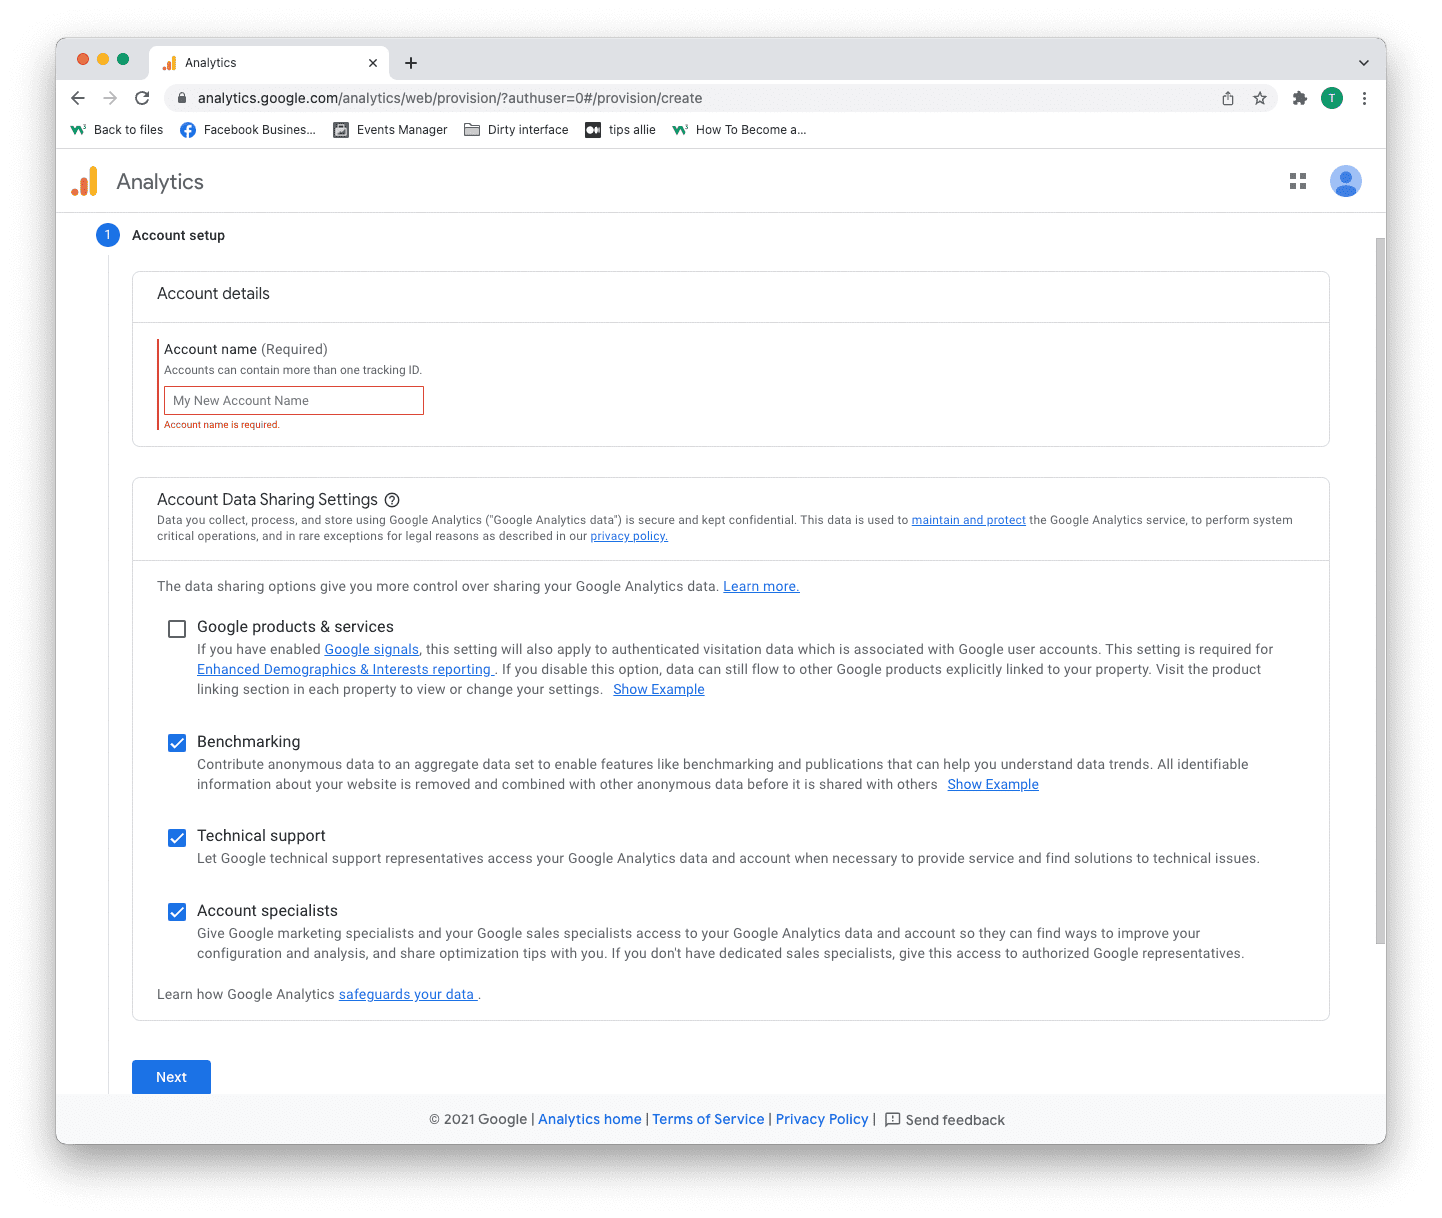
ステップ3:アカウントの設定
ここで行うべき2つの決定があります。
- アカウント名を入力してください。
- 共有するデータを決定します。
- 「次へ」ボタンをクリックします。
1つのアカウントに複数のトラッキングIDを含めることができます。1つのアカウントで複数のWebサイトを追跡できます。
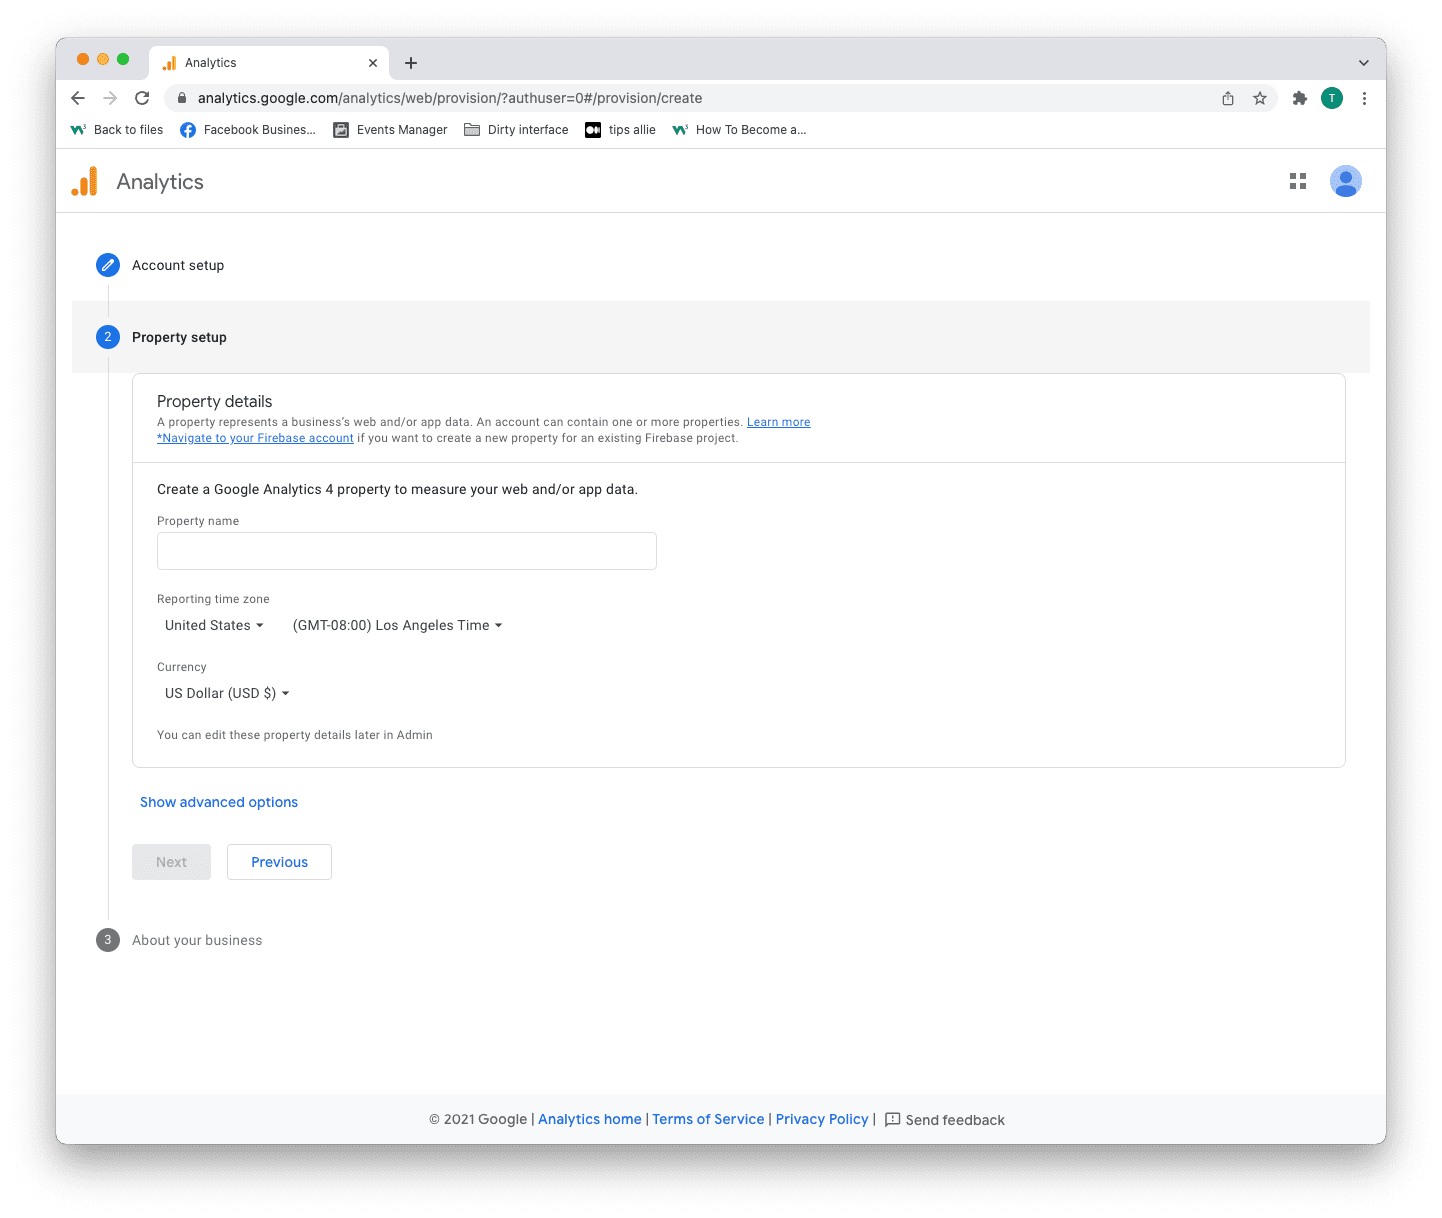
ステップ4:プロパティの設定
プロパティは、Webサイト、アプリケーション、リンクツリーなど、測定するサービスです。
- プロパティ名を入力します。
- タイムゾーンを入力してください。
- 使用する通貨を入力してください。
- 「次へ」ボタンをクリックします。
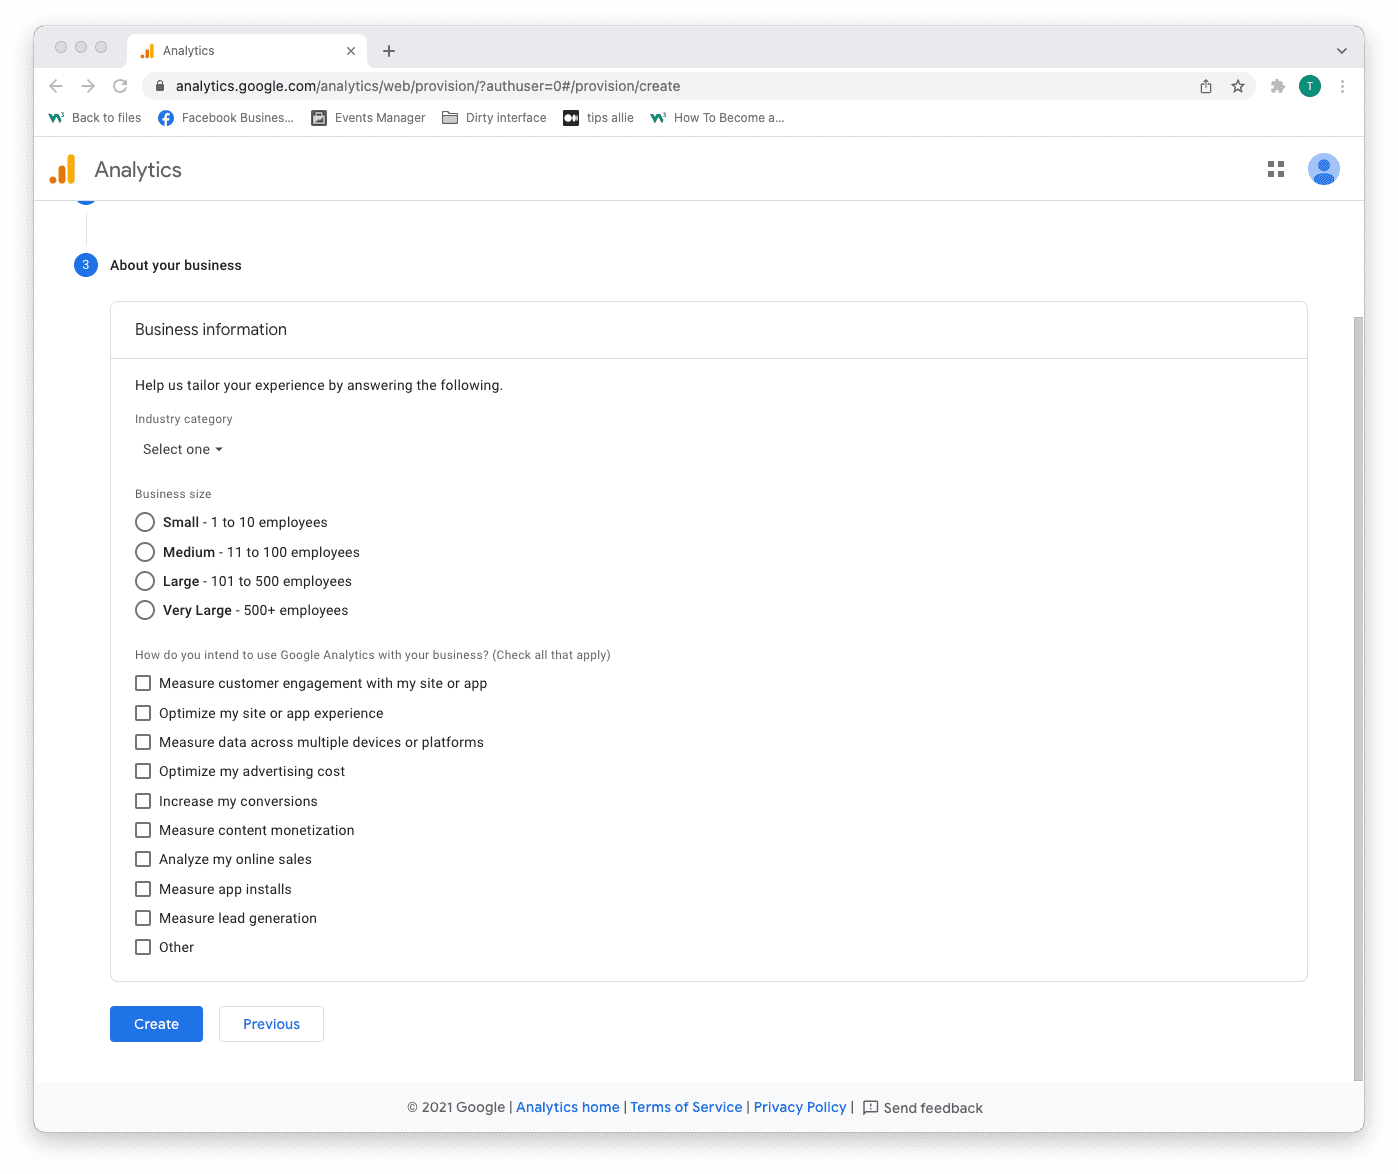
ステップ5:ビジネス情報を追加する
Analyticsは、この情報を使用してエクスペリエンスを調整します。
- 業界カテゴリを選択してください。
- ビジネスサイズを選択します。
- Tick the boxes for how you are planning to use Analytics.
- Click the "Create" button to proceed.
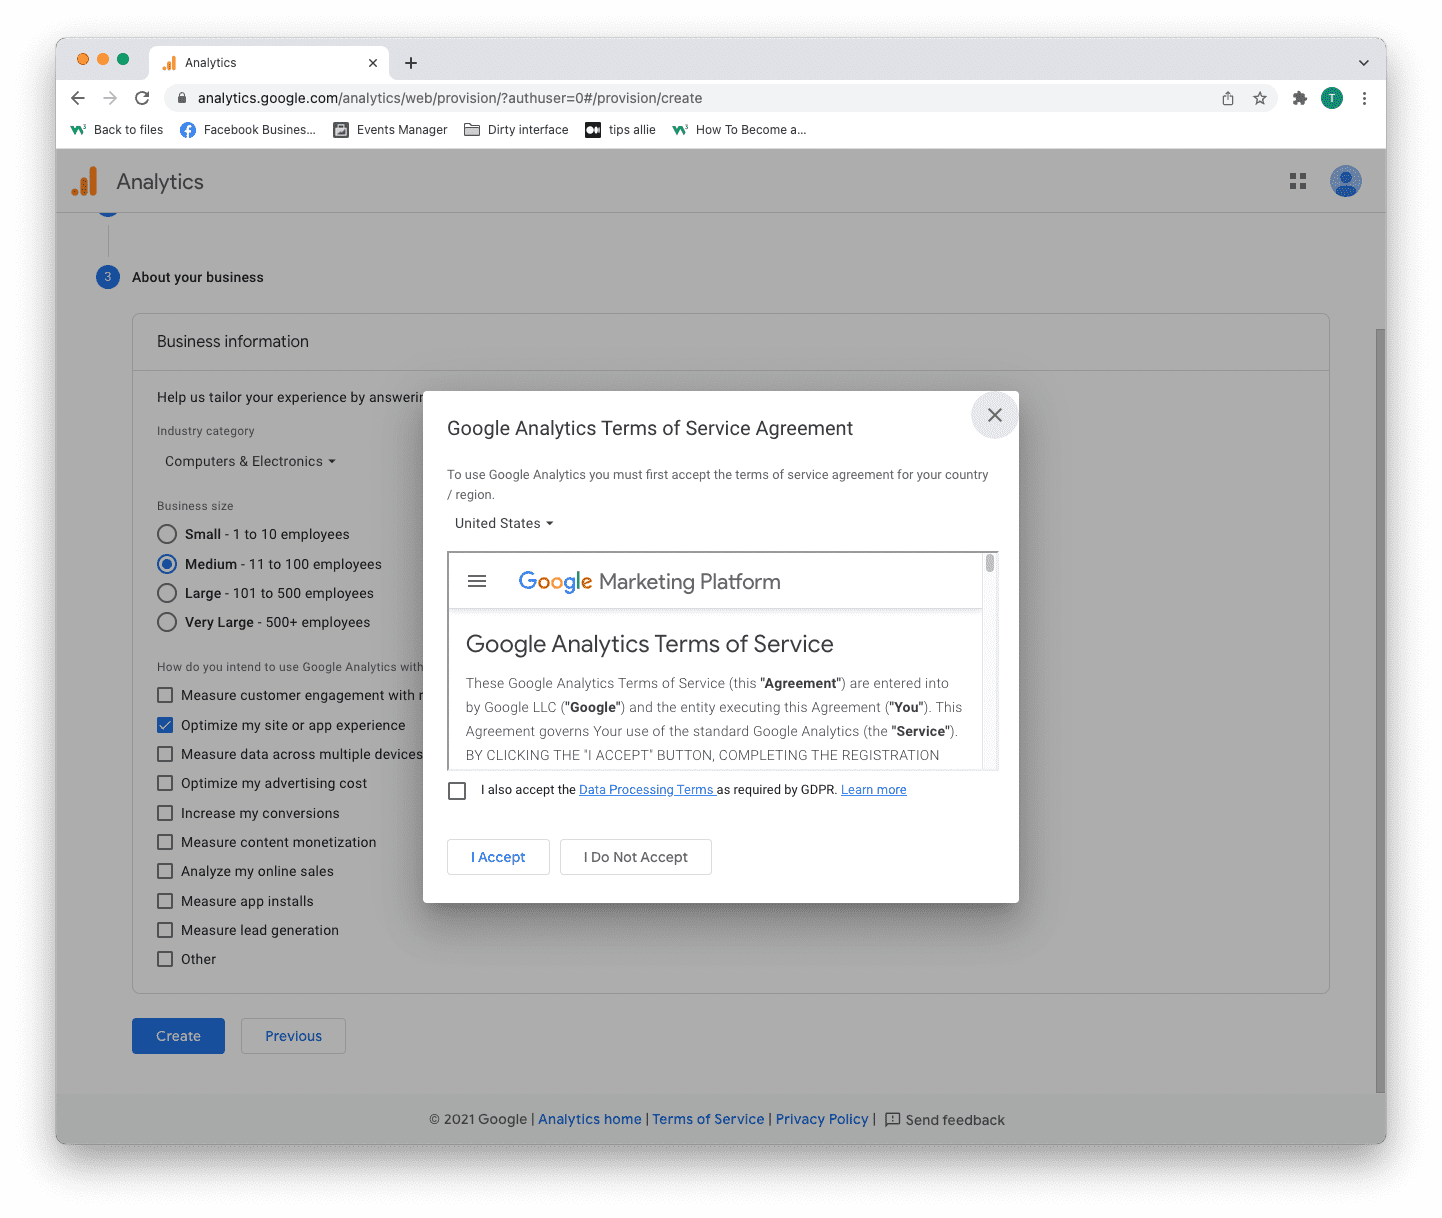
Step 6: Terms of Service Agreement
Read and understand the terms of service.
Tick the GDPR box and click the "I accept" button if you agree.
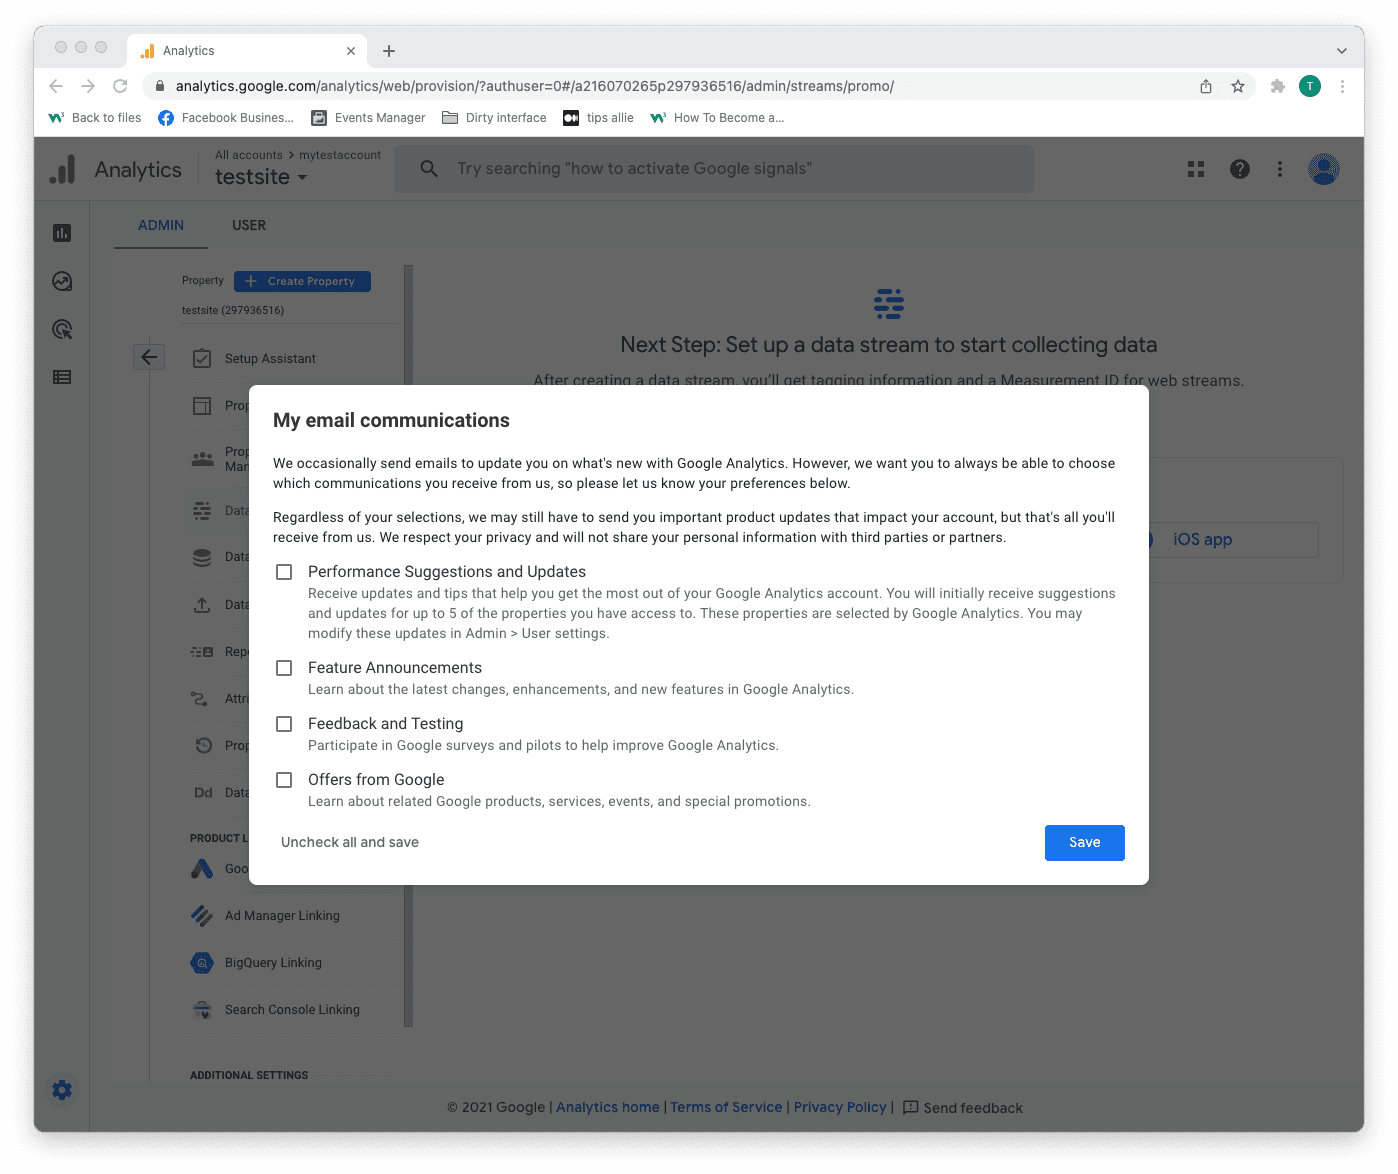
Step 7: Email subscriptions
- Tick or uncheck all boxes.
- Click the "Save" button to continue.
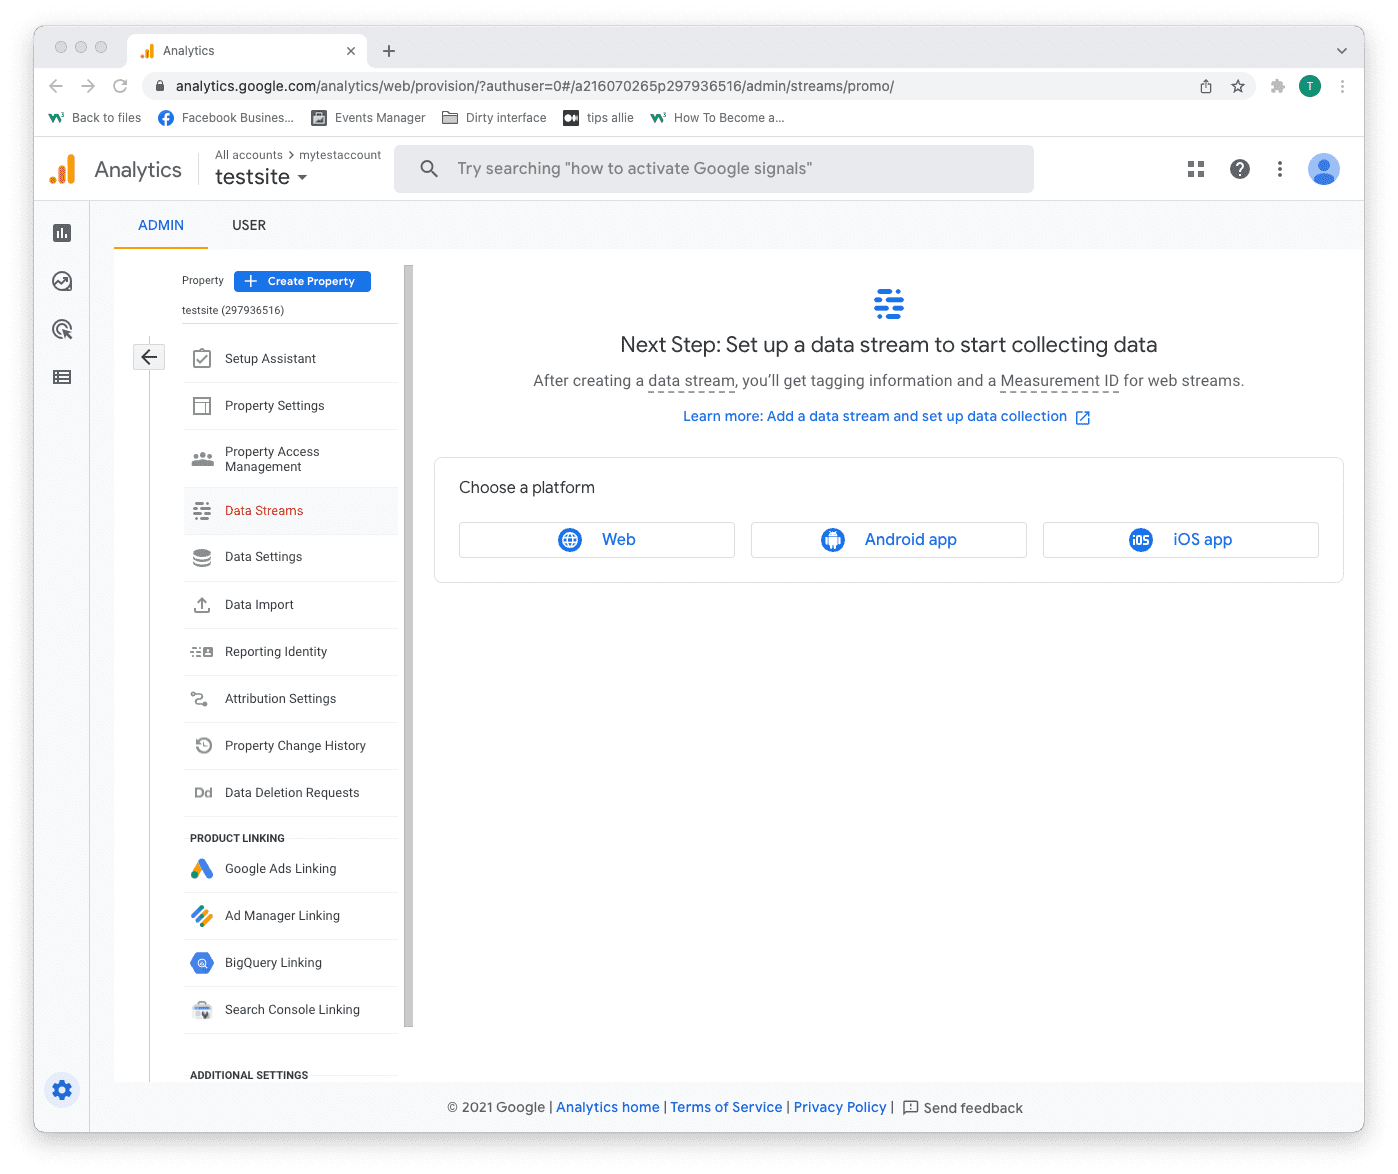
Step 8: Select platform
Chose the platform where you are collecting data.
Then, click the relevant platform to continue.
We are continuing with "Web" as the example in this tutorial.
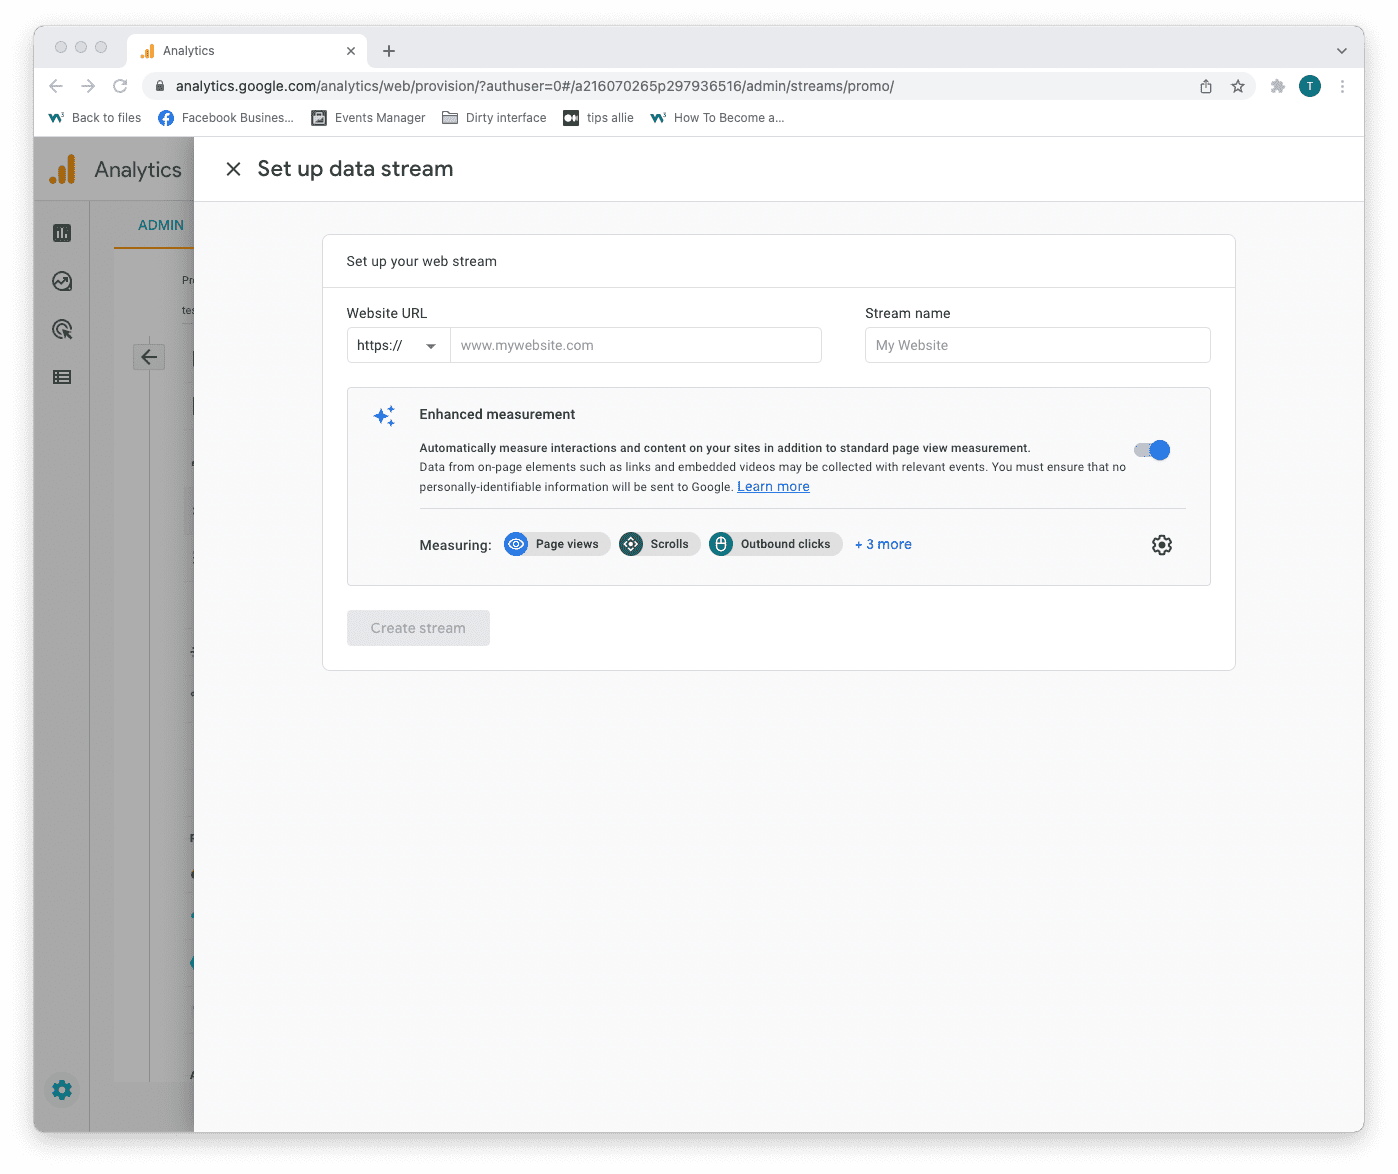
Step 9: Data stream setup
Enter data stream details.
- The URL to your site.
- The name that you want to give the stream.
- Decide if you are to enable enhanced measurement or not.
- Click on the "Create stream" button to continue.
The enhanced measurement can give the data more context. Improving your understanding of the traffic.
Step 10: Web stream overview
Here you can see a detailed overview of the web stream.
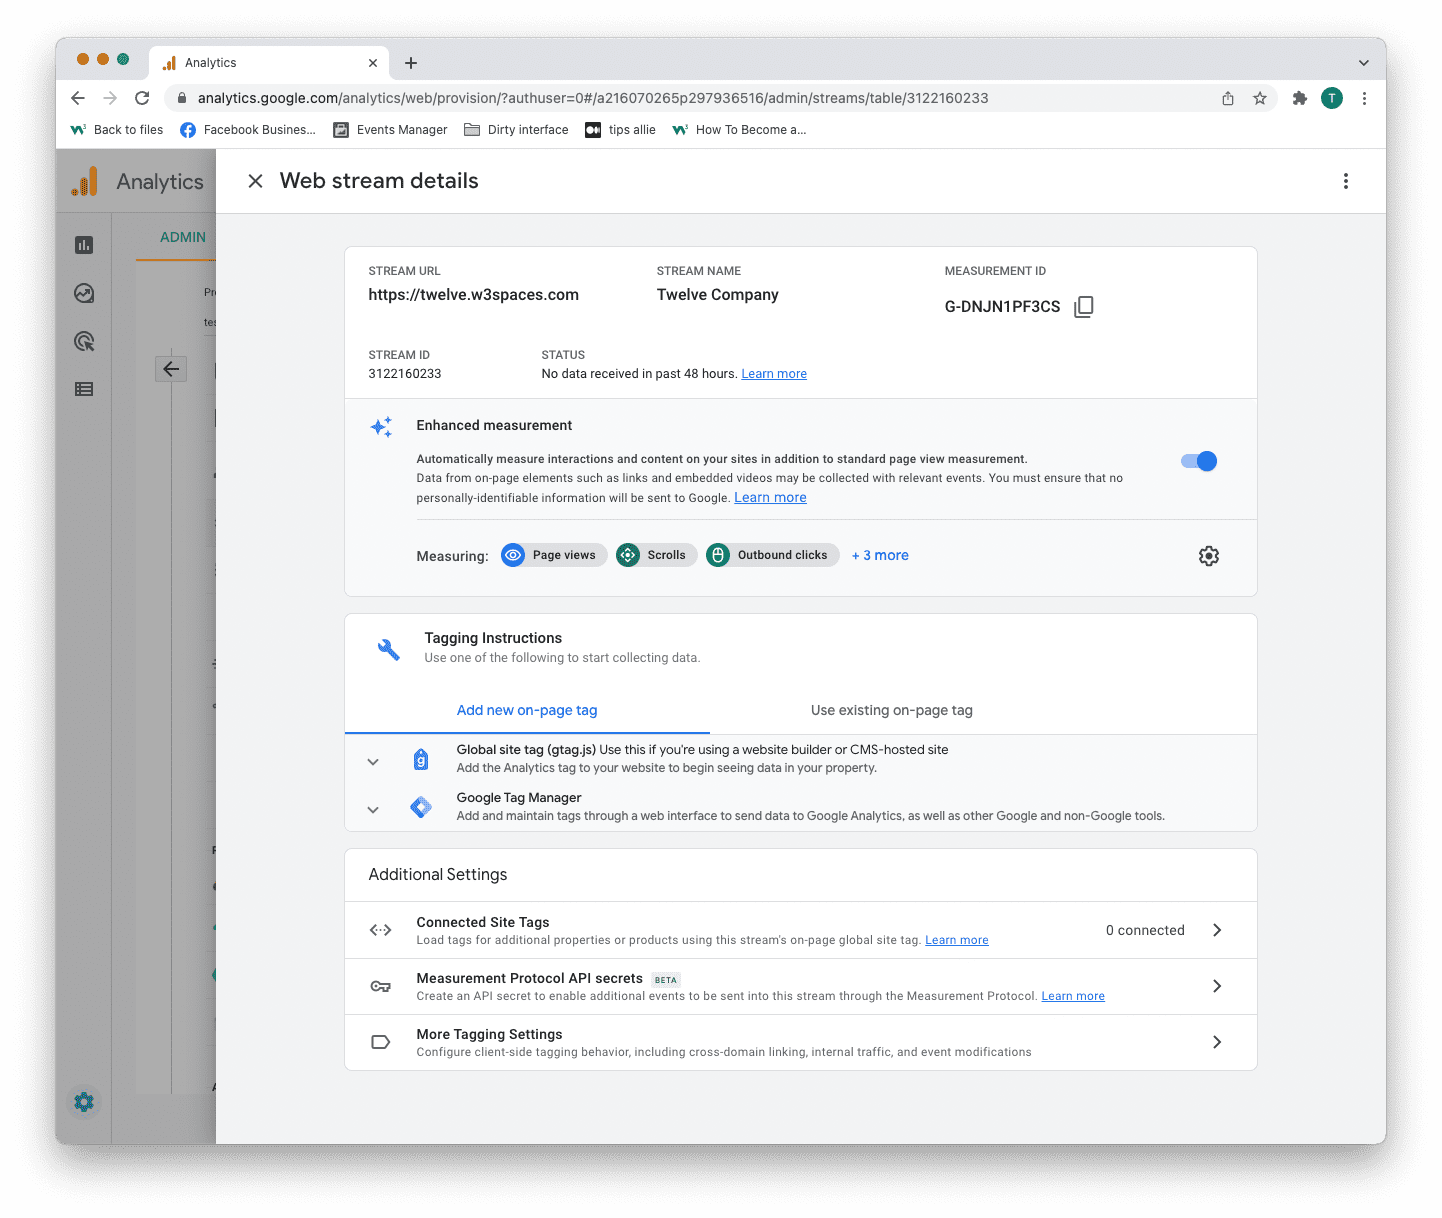
Here are the key takeaways from the overview.
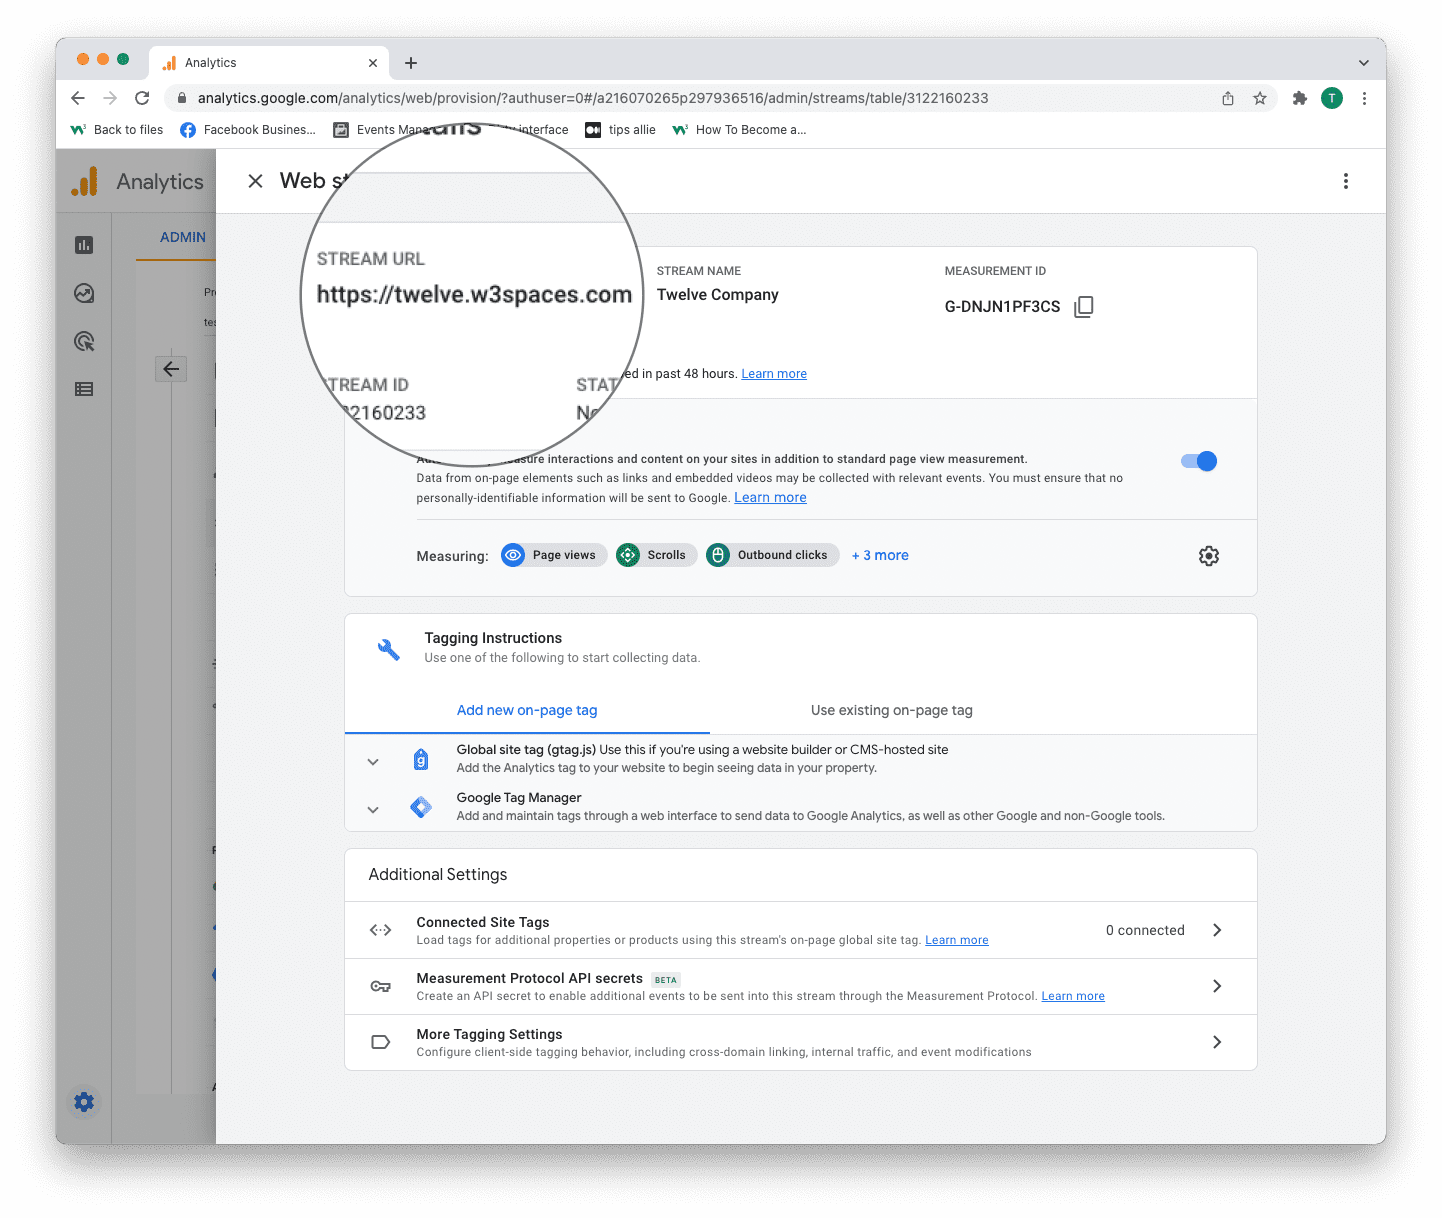
1. Stream URL.
The Stream URL is the link to the connected site.
2. Measurement ID
The Measurement ID is the identifier for your data stream.
It has a format of G-XXXXXXX.
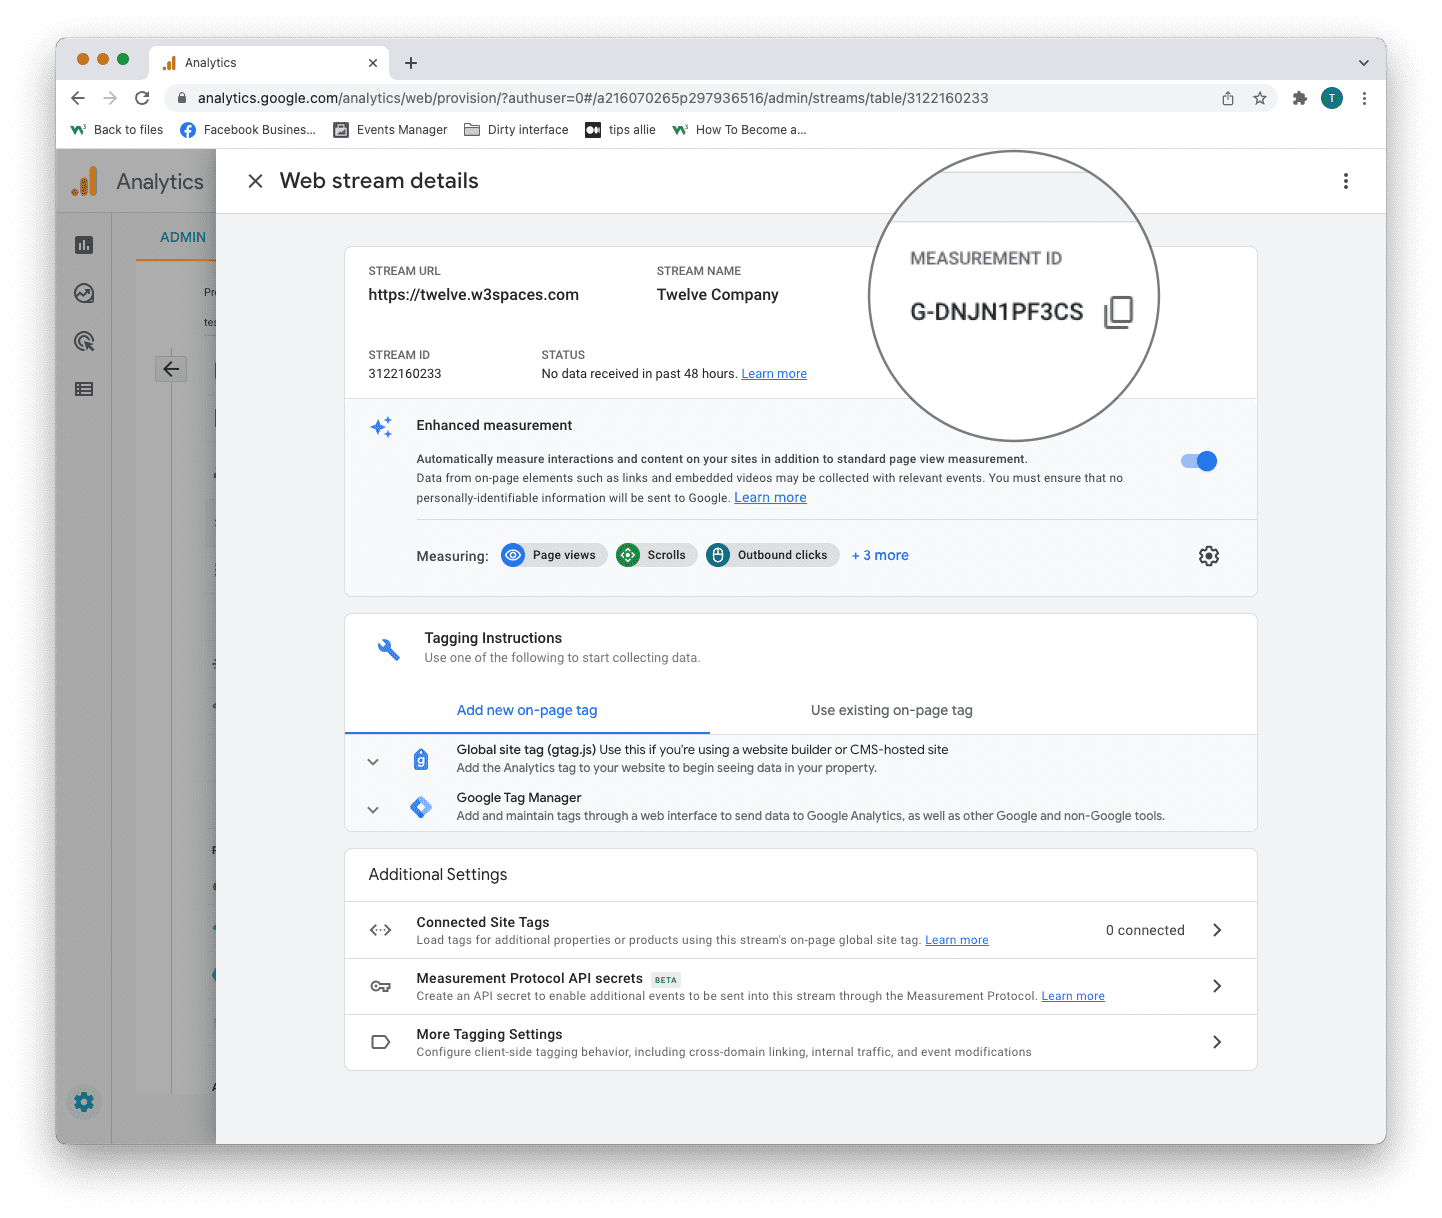
Google Analytics 4 uses Measurement ID. Older versions use Tracking ID. You can not have both.
3. Tagging instructions
Decide to use Global site tag (gtag.js) or Tag manager.
This tutorial will use the Global site tag.
Installing the Global site tag is the easiest and quickest way of getting it up and running.
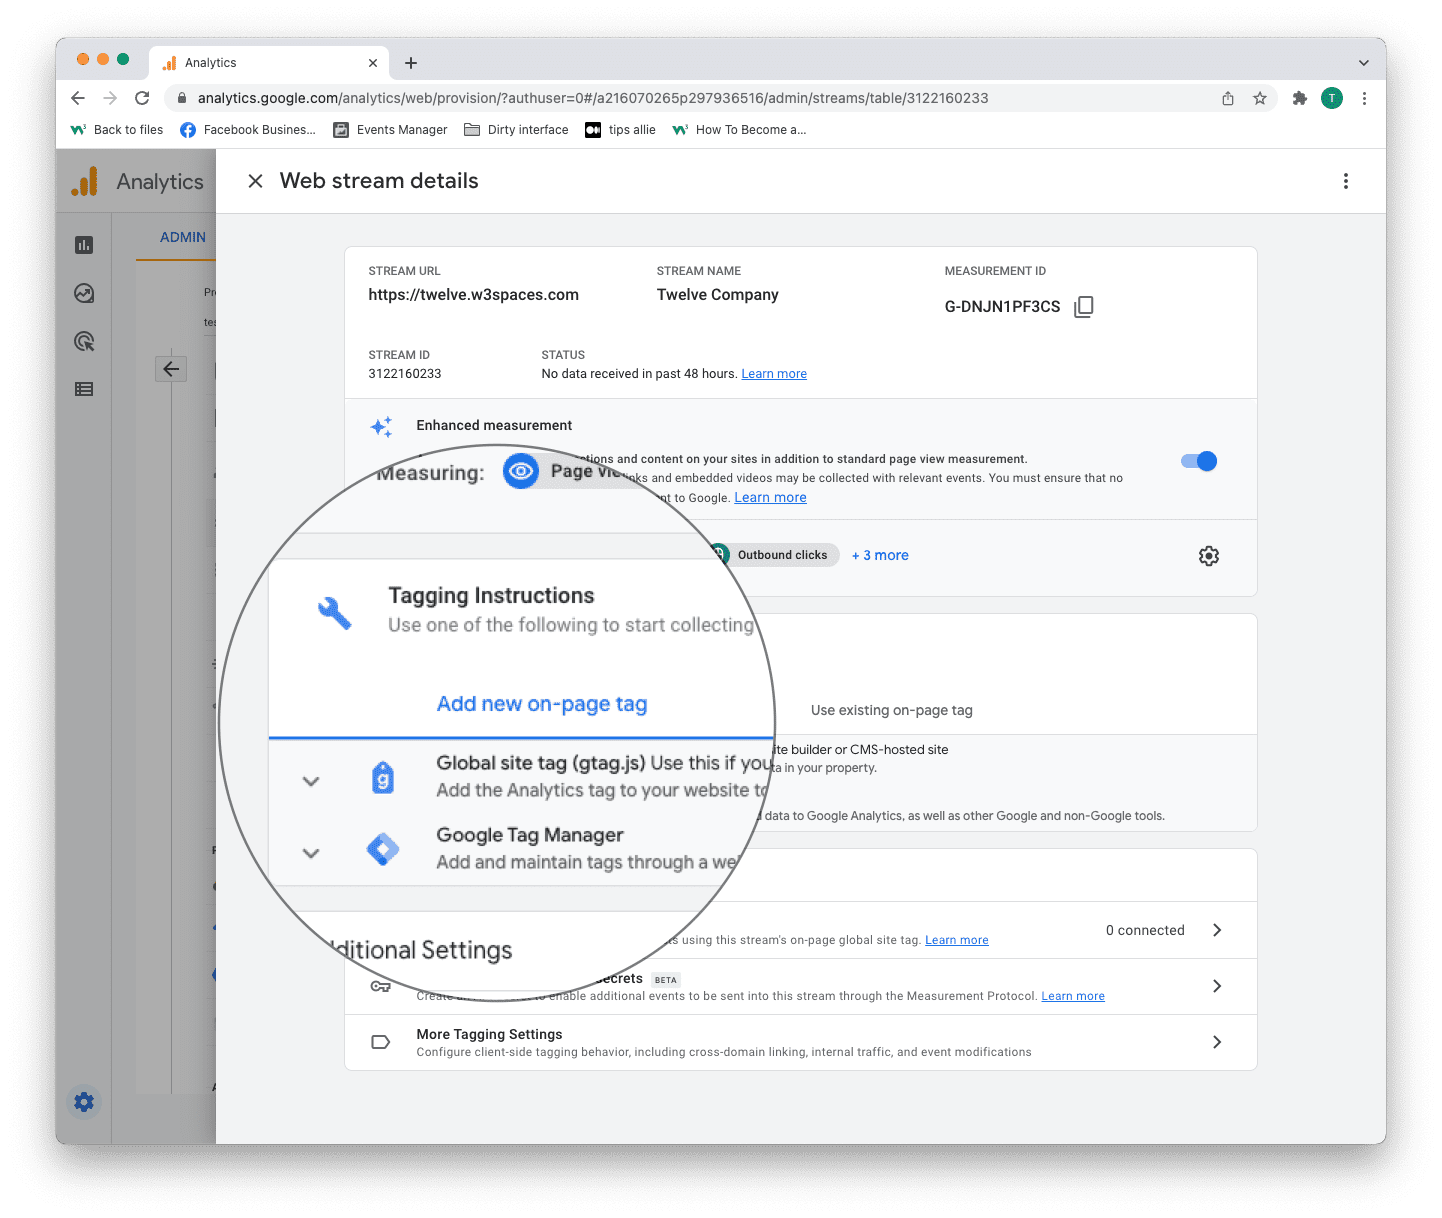
Step 11: Global site tag (gtag.js)
Click the "Global site tag (gtag.js)" row.
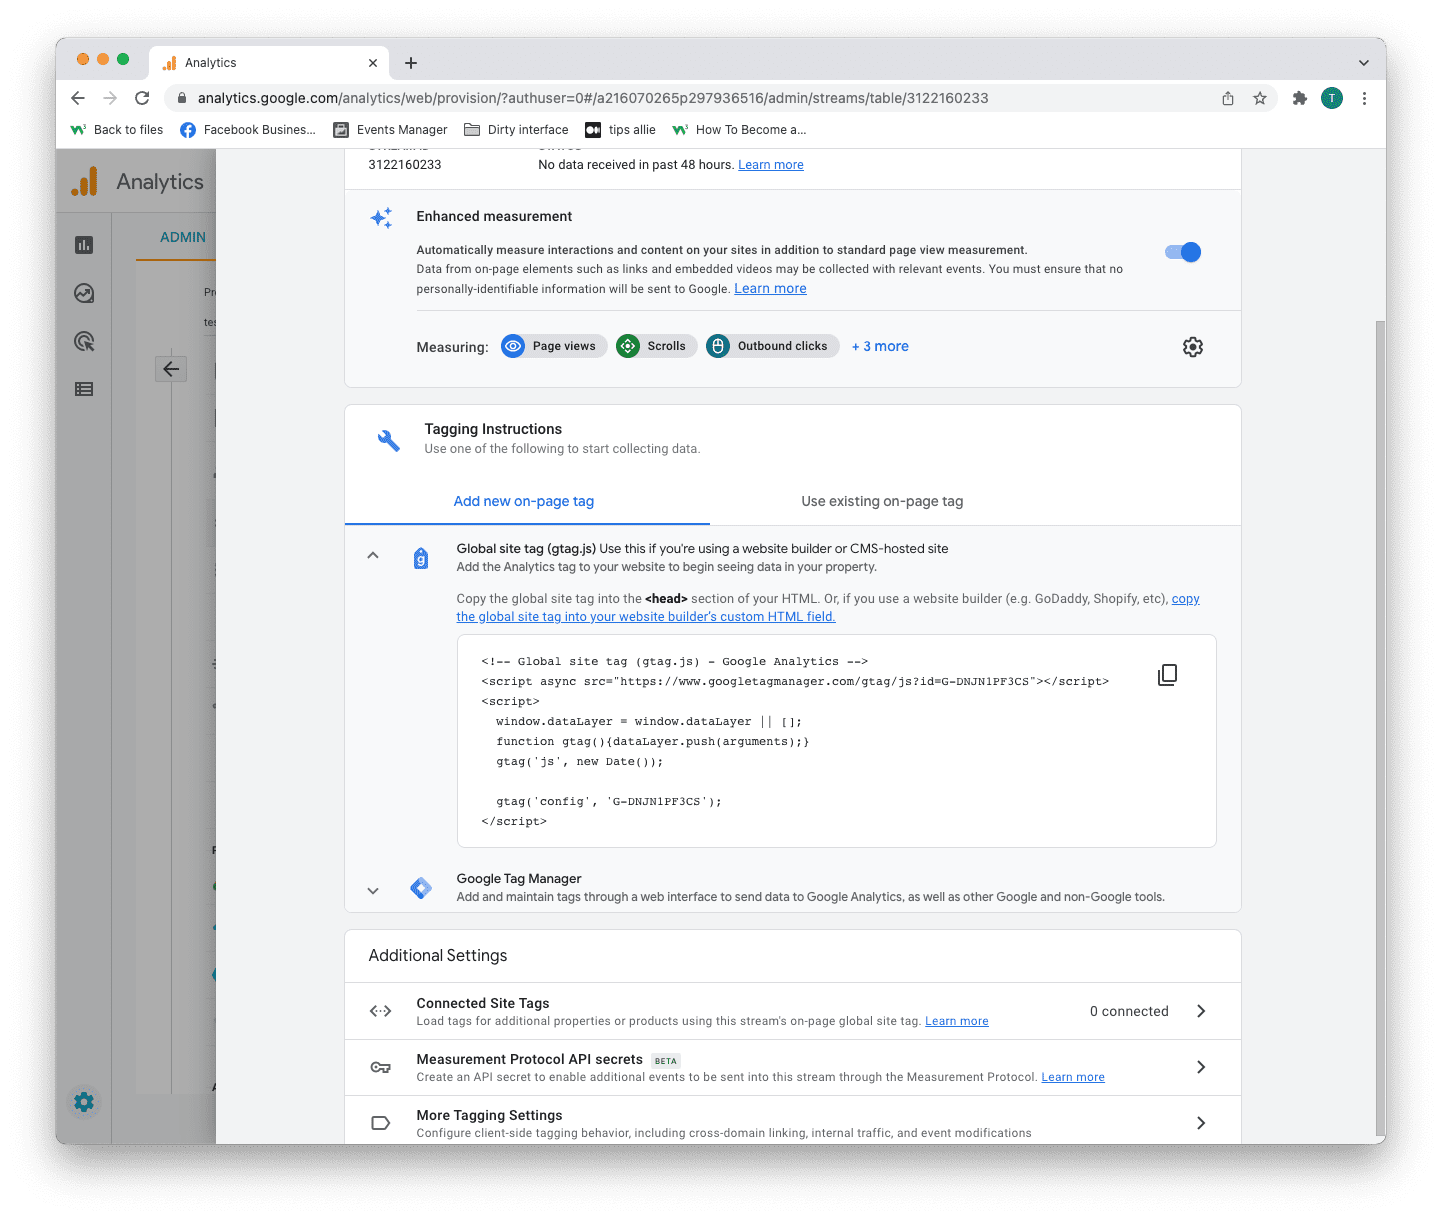
Here you can see a code snippet.
The code snippet is a script to allow Google to measure data on your site.
You can see the Measurement ID in the second last line in the code snippet.
The code snippet
<!-- Global site tag (gtag.js) - Google Analytics -->
<script async src="https://www.googletagmanager.com/gtag/js?id=G-DNJN1PF3CS"></script>
<script>
window.dataLayer = window.dataLayer || [];
function gtag(){dataLayer.push(arguments);}
gtag('js', new Date());
gtag('config', 'G-XXXXXXX');
</script>
Step 12: Enter the code snippet
Copy the code snippet.
Make sure to include your Measurement ID.
Locate the <head> tag in your HTML.
Paste the code snippet just below the <head> tag.
Save and publish the code.
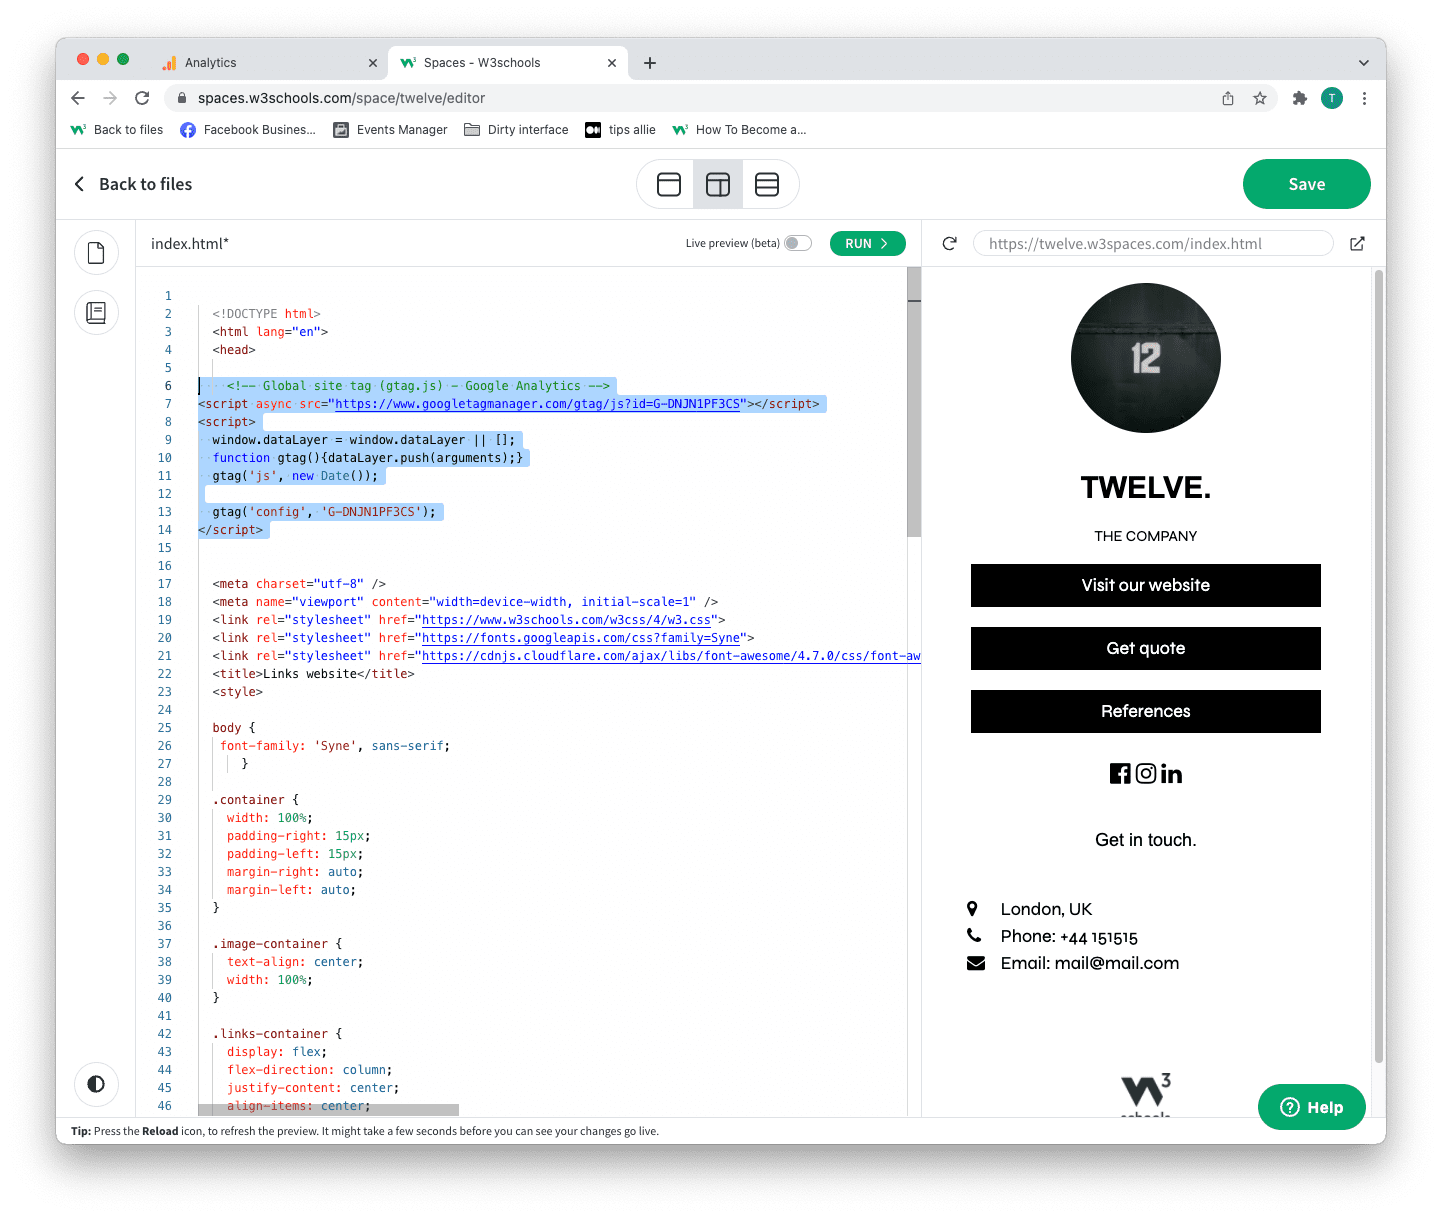
We used W3Schools Spaces in this example.
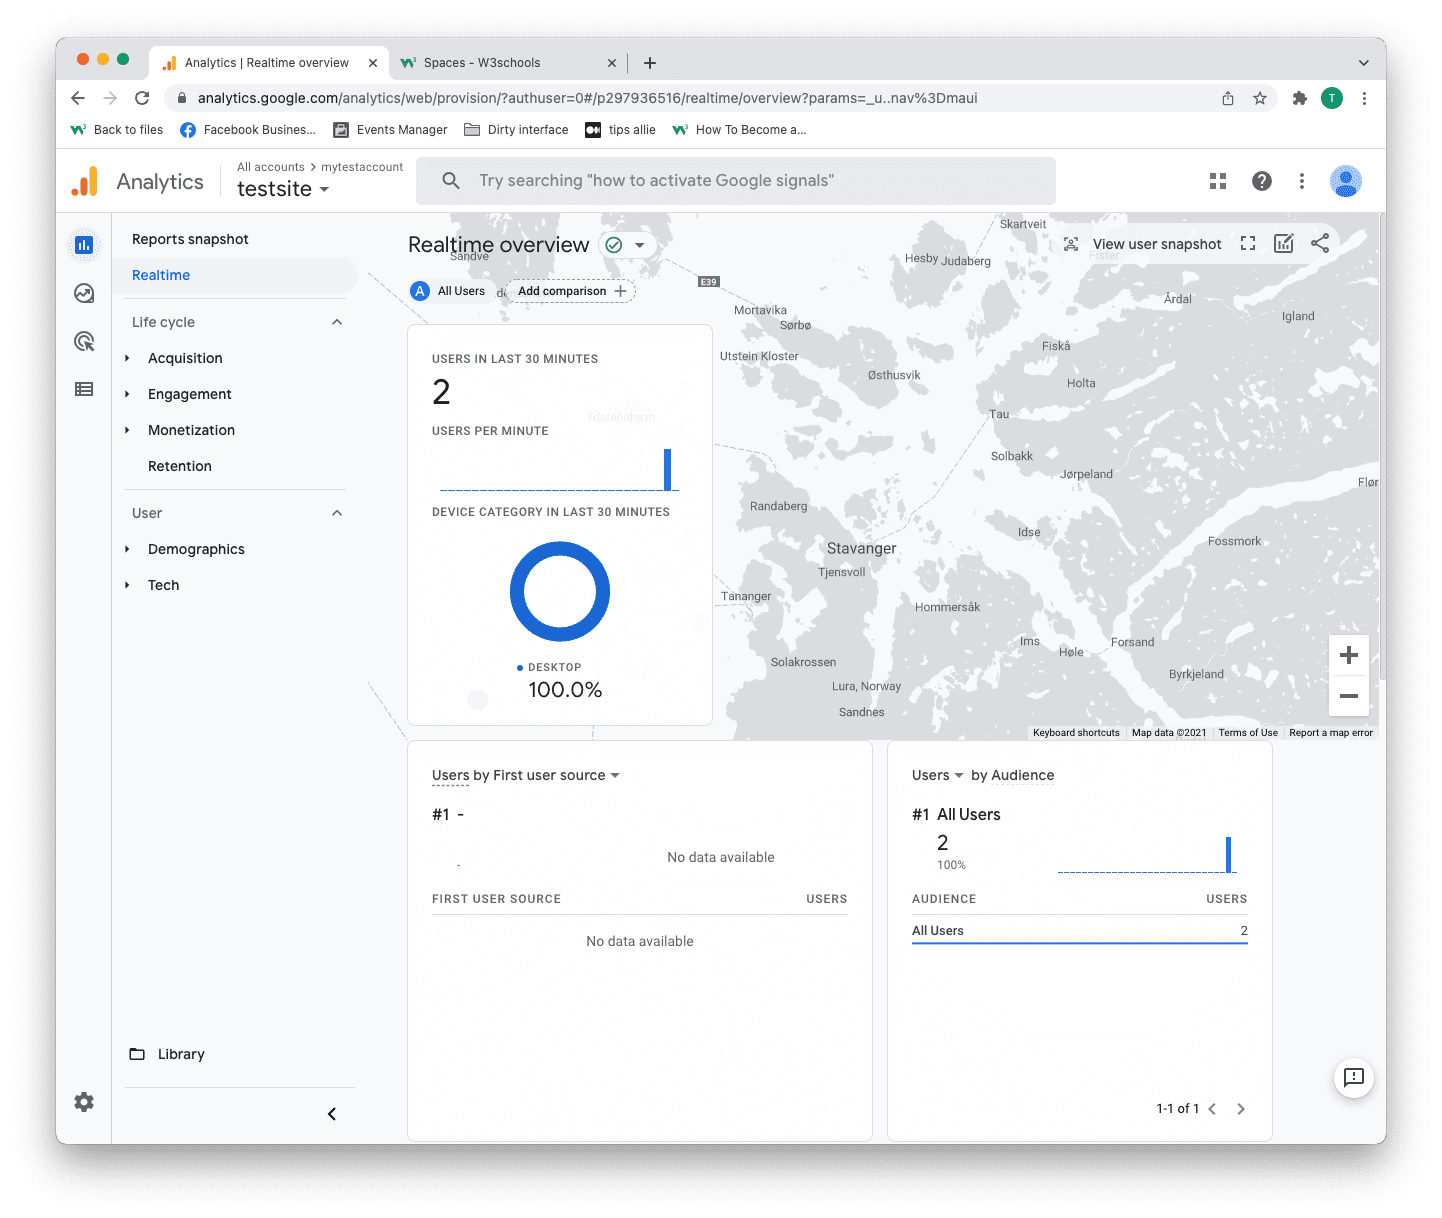
Step 13: Test that it works
Ensure that you have successfully saved and published the code snippet with the correct Measurement ID.
Open the URL for the site you have connected to the data stream.
Click on "Real time" on the menu to the left.
Confirm that you see yourself as an active user.
Congrats. You have successfully enabled Google Analytics for your site!
Explore Google Analytics
Recommended related topics are Tag manager and Events
Spend time in the service to learn about your user activity, commerce, demographics, device, and referrals.
Tip: Ever heard of W3Schools Spaces? It is a personal space where you can make a website from scratch or use a template and host it for free.
It has everything you need in the browser.
Get started in a few clicks.
Start now for free ❯* no credit card required